Connect Mac and Windows: direct USB-C or local network
Keep your Mac and Windows PC at the same desk, with each computer running its own apps. Slipstream joins their input, clipboard, file-copy controls and project workspace over a compatible direct cable network or an explicitly selected local network.
By IndepApps · Published
Two routes, one first-time setup
Choose compatible direct USB-C networking or an explicit local-network connection over Wi-Fi or Ethernet. Both routes begin with installation, running both apps, OS permissions and an approved first pairing.
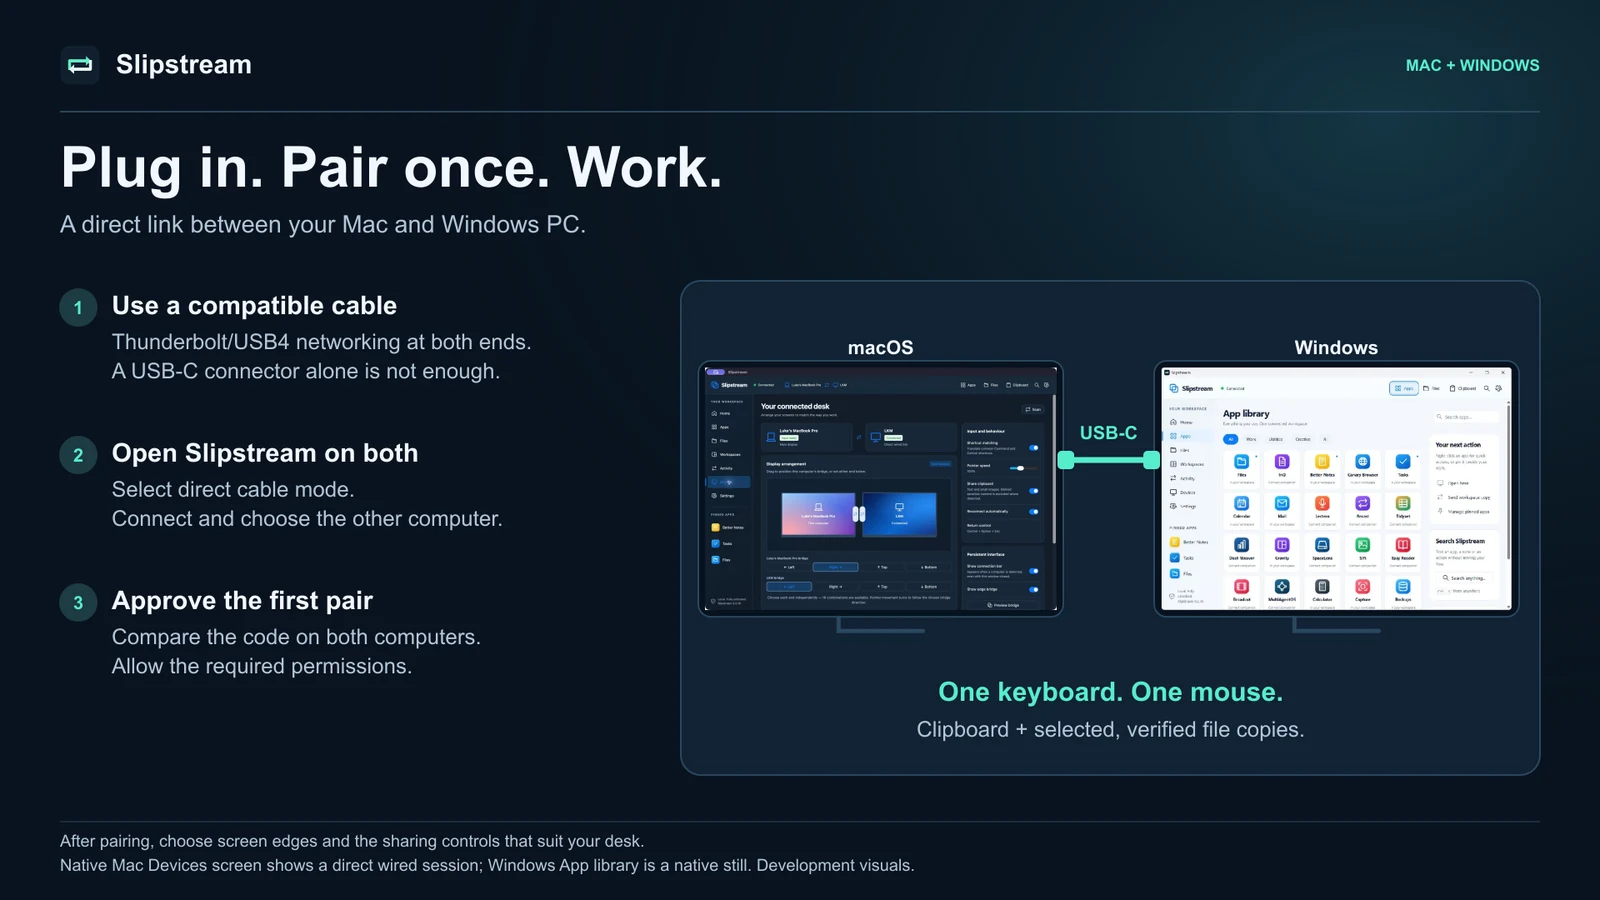
- Install and open both apps. Install the appropriate Mac or Windows app on each computer, use the bundled Windows runtime installer if Setup requires it, and keep Slipstream running on both.
- Choose your connection. Select compatible direct USB-C networking or explicit local-network mode over Wi-Fi or Ethernet.
- Connect and approve the first pairing. Choose the intended computer from detected peers. Compare the verification codes on both computers and approve the peer on both sides.
- Allow the required permissions. On each Mac, grant Accessibility for shared input and local-network access where prompted. On each Windows PC, approve Setup’s normal local-connection registration if requested; keep firewall protections enabled.
- Arrange the desk and check the connection. Choose the screen edges, then test ordinary typing, pointer movement and clipboard content in both directions.
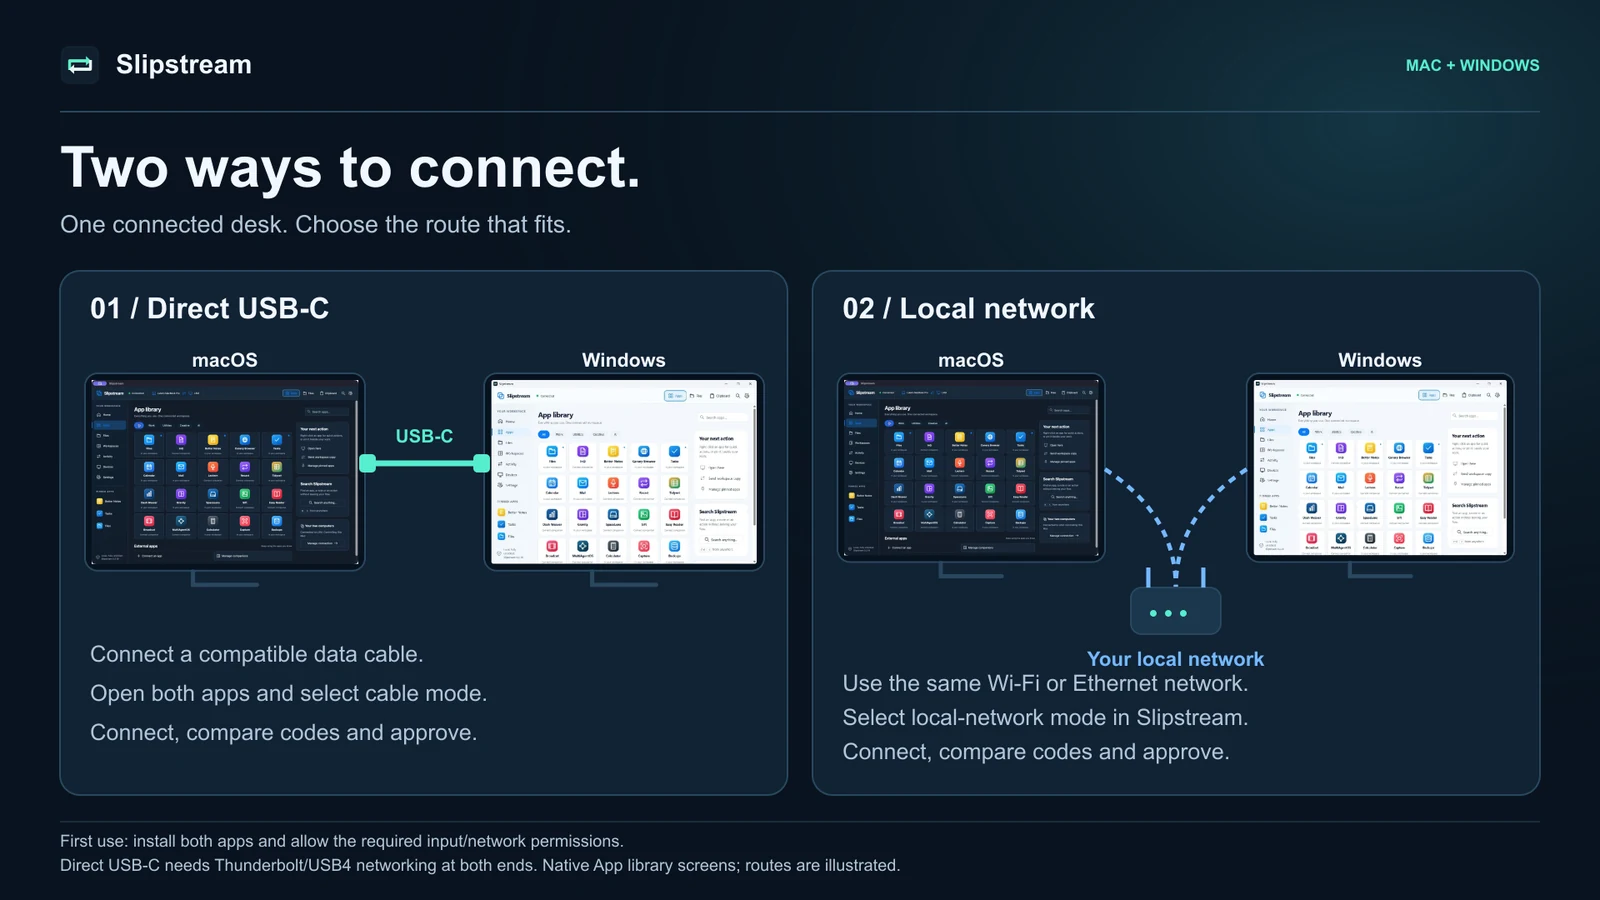
Check the ports, cable and operating systems first
The complete Slipstream edition supports macOS 13 or later on Apple silicon or Intel and Windows 10/11 on x64 or ARM64. App compatibility and cable-network compatibility are separate checks: Windows 10 support does not mean every Windows 10 PC provides USB4 networking.
USB-C describes the connector. For cable-only mode, both computers must expose compatible Thunderbolt or USB4 host-to-host networking and the cable must support that connection. An ordinary USB data port or charging-only cable does not create the required network adapter. Check the computer manufacturer’s specification for your exact model.
| What you have | Connection to consider | What to verify |
|---|---|---|
| Mac and PC with compatible Thunderbolt/USB4 networking | Direct USB-C cable-only mode | Supported host-to-host adapters on both computers, suitable cable and a paired peer on that route. |
| A USB-C connector without compatible host networking | An explicitly selected local network | Both computers can reach each other on the chosen network. A different cable alone cannot add a missing host capability. |
| Files or folders to another folder, drive or mounted share | Blitzer | Choose or drop a source, choose its destination, then copy with adaptive parallel chunks and destination verification. |
| One Mac with several displays | Gravity | Window layouts on one Mac do not require a second computer or a cross-OS bridge. |
Connection references: Apple: IP over Thunderbolt and Microsoft: USB4 interdomain networking. These explain OS networking; neither is a certification of every Mac–PC combination.
1. Establish a compatible direct USB-C route
Connect the compatible ports directly and check the operating systems before pairing. On Mac, look in System Settings → Network for Thunderbolt Bridge. On a supported Windows USB4 system, check that a USB4 peer-to-peer network adapter appears. Microsoft documents link-local IPv4 addresses for this connection.
If either adapter is missing, check the cable, ports, manufacturer drivers and OS support before troubleshooting the app. A USB-C connector on a dock does not by itself establish a computer-to-computer route. Keep firewalls enabled; approve the normal app or Setup permission prompt if requested. Setup manages Slipstream’s narrowly scoped registration; managed policy restrictions must be resolved by the administrator.
Choose USB-C cable-only mode in Slipstream when you want sharing bound to that wired route. It does not silently switch to Wi-Fi. Select local-network mode deliberately when that is the route you intend to use.
Or choose the local network
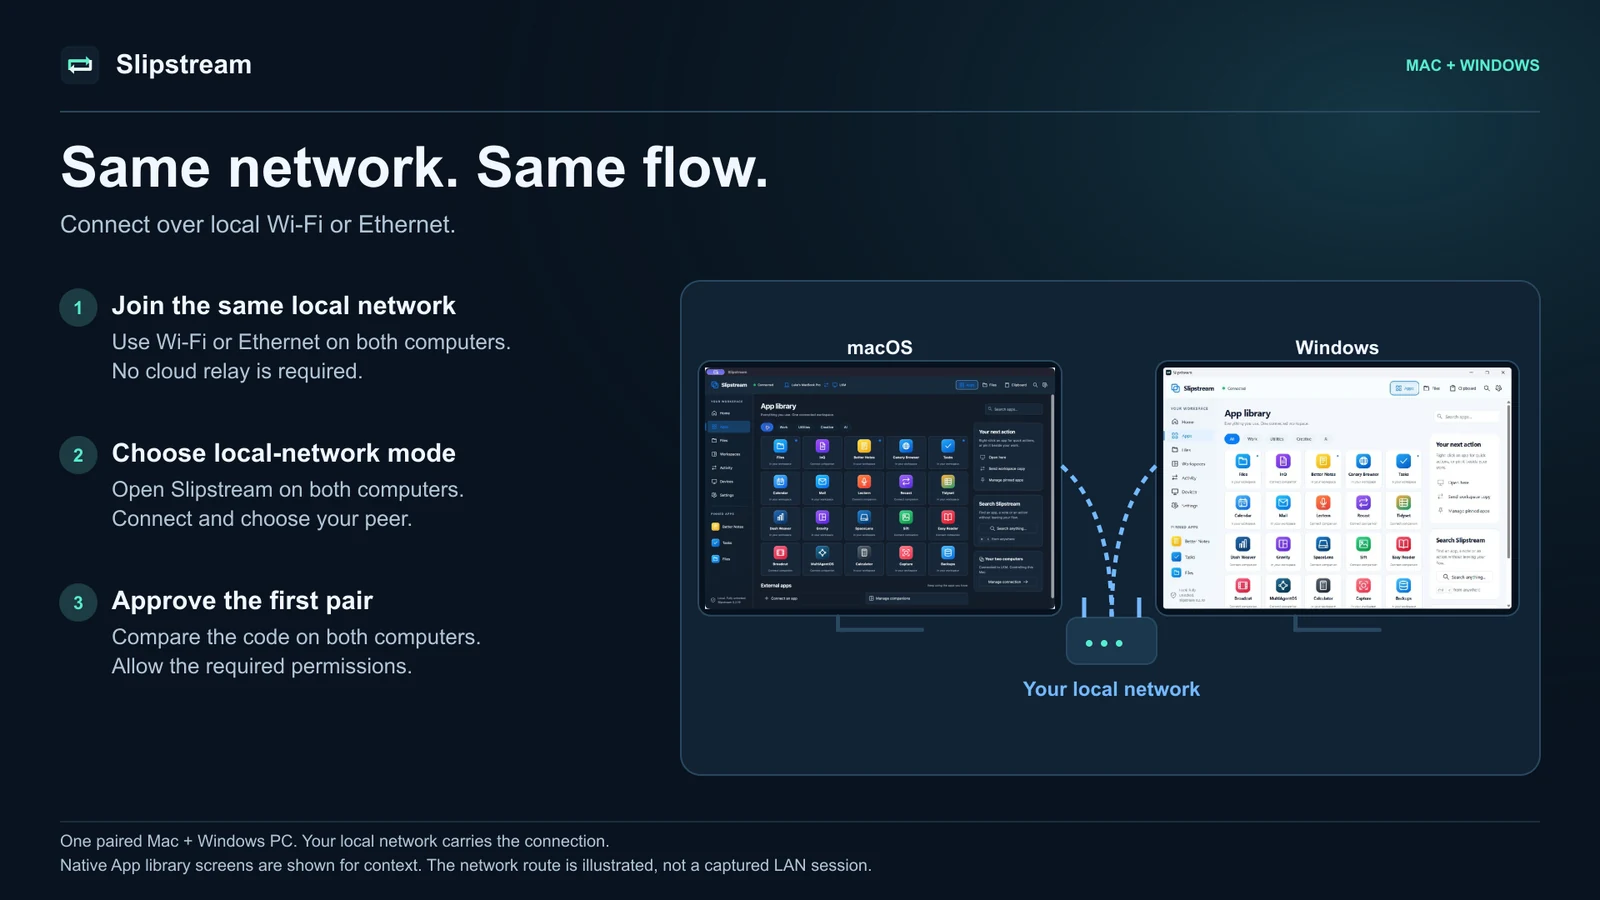
Connect both computers to the same trusted local network using Wi-Fi or Ethernet. Keep both apps open and select local-network mode explicitly. Both computers must be reachable through the chosen route; local firewall and OS permissions still apply.
Compare the verification codes and approve the peer before using shared input, clipboard or copy controls. A cloud account or internet relay is not required for the paired connection.
2. Pair the two computers and test input
Install the supplied Mac and Windows apps and open both. Choose the intended computer from the detected list. Compare the verification codes on both computers, review the peer identity and approve it on both sides before trusting it. Paired connections use authenticated TLS and remembered device identities, with no Slipstream cloud relay or account.
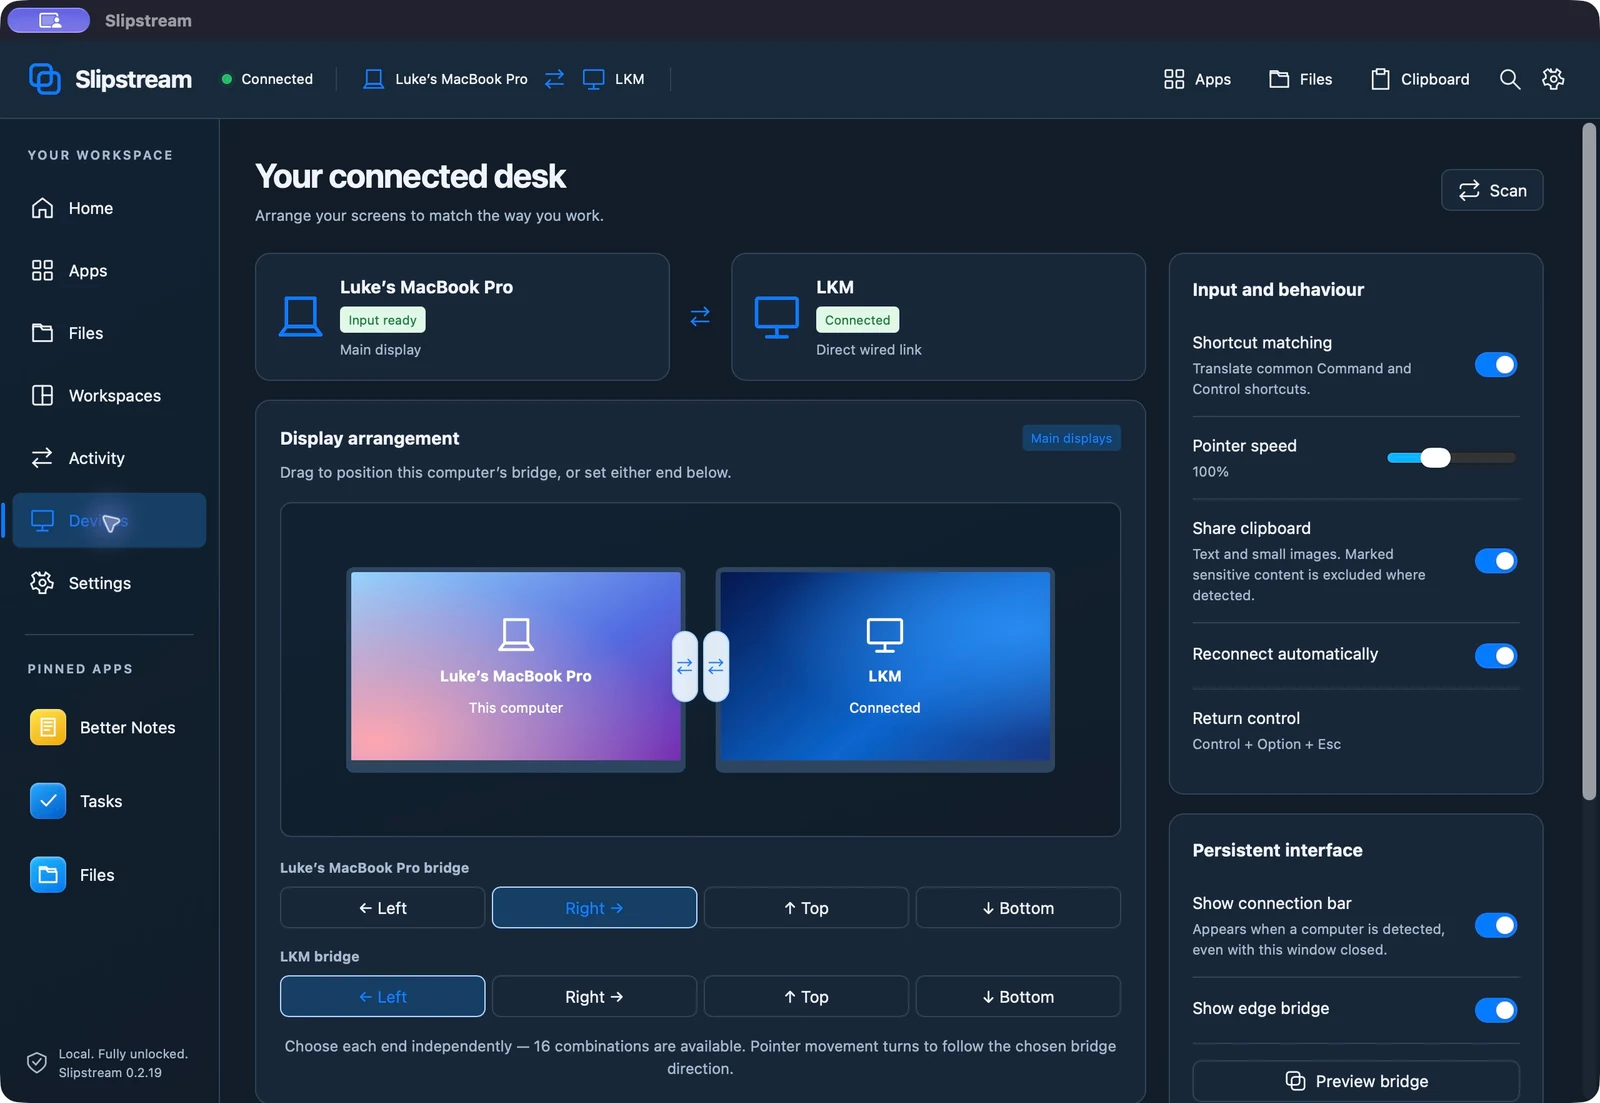
Grant the permissions requested for the input-sharing workflow, including macOS Accessibility and local-network access where prompted. Approve Setup’s normal Windows local-connection registration if requested; keep firewall protections enabled. Set left, right, top or bottom independently for each main display. Start with a simple side-by-side layout and one ordinary app on each computer. Move the pointer across the configured edge, type a short line in a disposable document and check common copy/paste shortcuts.
Keep the local keyboard and pause or emergency-return controls accessible during setup. Windows login, UAC prompts and protected or elevated surfaces need local input. Slipstream supports Mac + Windows, Mac + Mac and Windows + Windows pairs and their main displays. This guide follows a Mac + Windows setup; additional monitor arrangements and international input-method compatibility need separate checks.
Returning to the same desk: development reconnect workflow
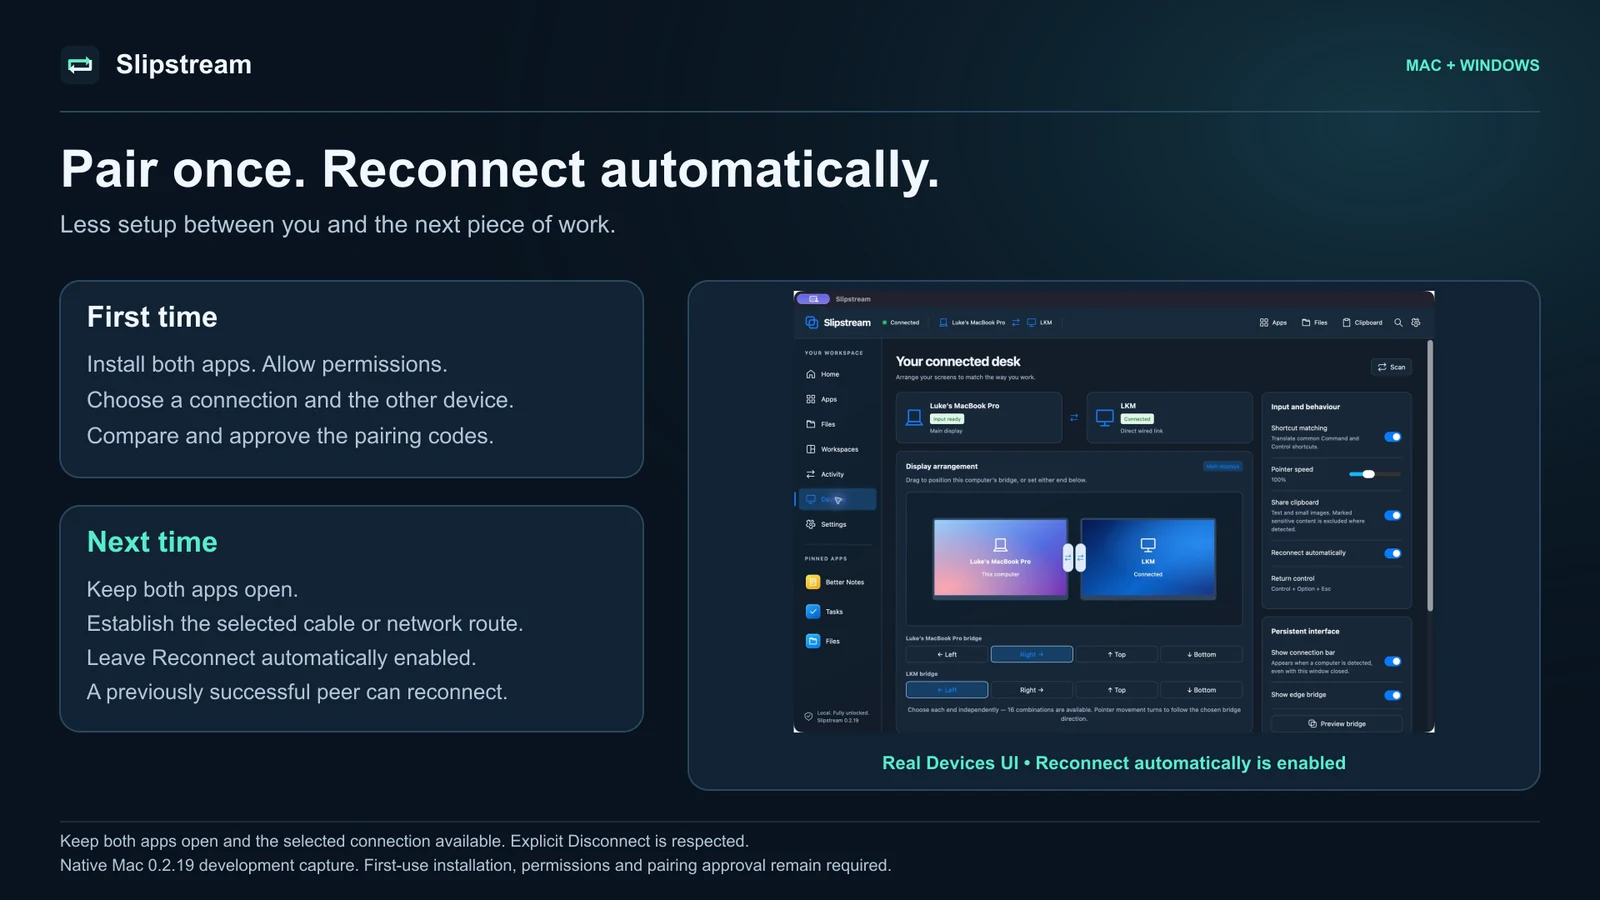
In the current development workflow, a previously successful, trusted peer can reconnect when both apps are running, the selected direct or local-network route is available and Reconnect automatically is enabled. Explicit Disconnect and disabled reconnect are respected. The apps are not installed as login services: keep them open and check the connected state before working. First pairing still needs code approval, and hardware compatibility testing continues.
3. Check text and image clipboard sharing
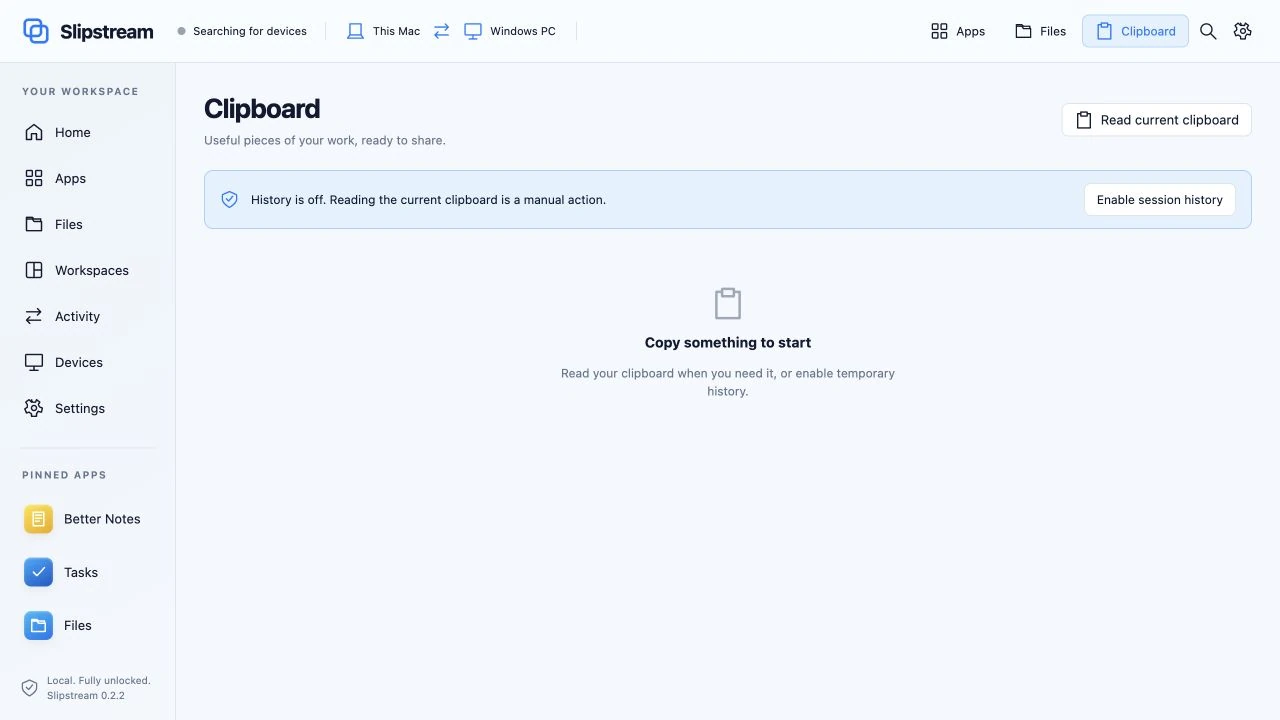
Copy a short non-sensitive line on one computer and paste it into an ordinary document on the other. Repeat in the reverse direction. Then test a small PNG image in an app that accepts image paste. Supported clipboard data is text and small images; a file copied in Finder or Explorer is not the same workflow.
Enable clipboard history only if you want it. History is optional, bounded and held in memory. Avoid using passwords or private material as a test input. If an image fails while text works, check the image format and size and the receiving app before assuming the connection failed.
4. Send a file copy and verify the result
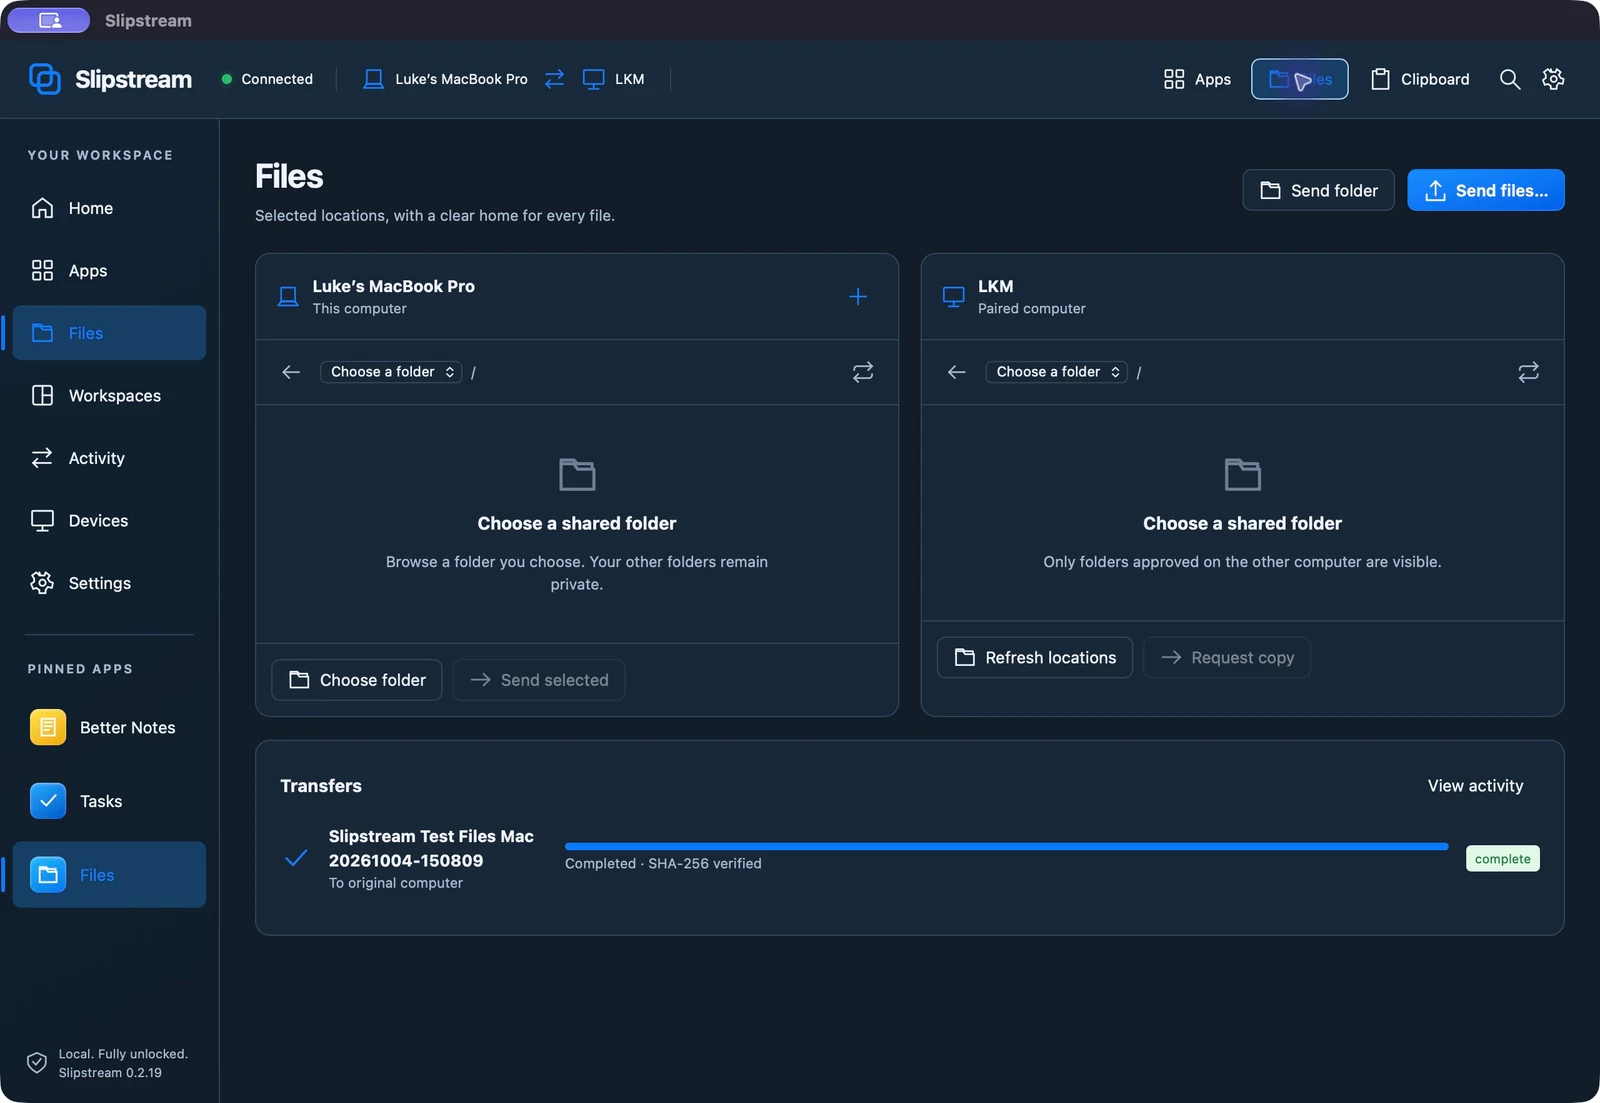
Choose the folders the peer may browse. Use Send Copy or Request Copy for a small disposable file, then inspect the destination and the transfer result. Choose keep-both or replace behavior deliberately when a destination already exists. Source files remain in place.
Slipstream uses chunk and whole-file SHA-256 checks and transfer journals for verified, resumable copies. A progress bar reaching its end is not a reason to delete your original. Confirm that the result is complete, opens in the intended app and has the expected name and size. Use a small folder next and account for every expected item.
For a useful test record, note both computers, app versions, OS versions, cable and connection mode. Record the transfer result and any skipped or failed item. No transfer-speed benchmark or universal hardware compatibility is claimed by this guide.
5. Bring the project workspace across
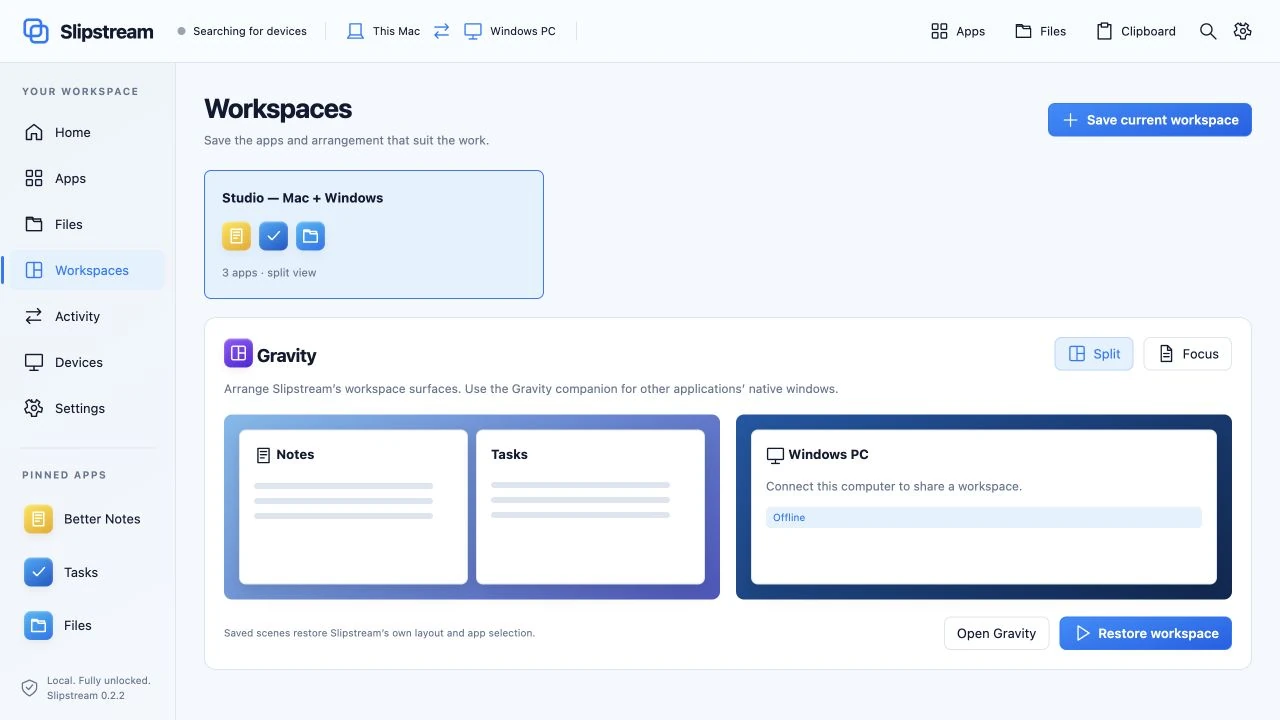
Keep notes, tasks, saved links and layouts together in a Slipstream workspace. Send a separate workspace copy for the receiver to approve, then check its contents there. Opening a copied link can require internet access and a separate login in the receiving browser.
Each computer retains its own operating system, installed applications and browser sessions. A workspace copy does not run a Mac application on Windows or move an unsaved document. Live app-window transfer and continuous native Finder/Explorer dragging are future updates.
Troubleshoot the layer that is failing
| Symptom | Check next |
|---|---|
| No cable-network adapter | Port capabilities, cable support, OS networking and manufacturer drivers. |
| Peer is unavailable | The selected route, both apps running, approved pairing and scoped firewall permissions. |
| Pointer does not cross as expected | The independently configured edges, main-display layout, input permissions and pause state. |
| Input stops at a protected Windows prompt | Use the local keyboard or pointer; protected/elevated control is outside the current workflow. |
| Clipboard works but a file does not paste | Use Send Copy or Request Copy. File copying and text/image clipboard sharing are separate. |
| A copy is interrupted or reports an error | Check its journal and destination result, resolve the error and retain the source until verification finishes. |
For a compatibility question, contact support with your hardware and connection details. Compare Slipstream with Synergy and other desk-sharing tools, or inspect real Mac and Windows app views before choosing. The complete website edition costs $10 once and includes both installers.
Devices and Files views are actual installed Mac 0.2.19 development-build captures from 10 October 2026. Devices shows direct wired connectivity; Files shows unselected folder controls and completed verified-copy history. Other workspace views are local source previews with sample content. The current customer package includes Mac 0.2.24 (build 29) and Windows 0.2.22. These views do not establish hardware-wide compatibility or paired live workspace sync.